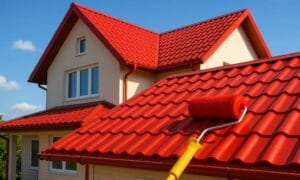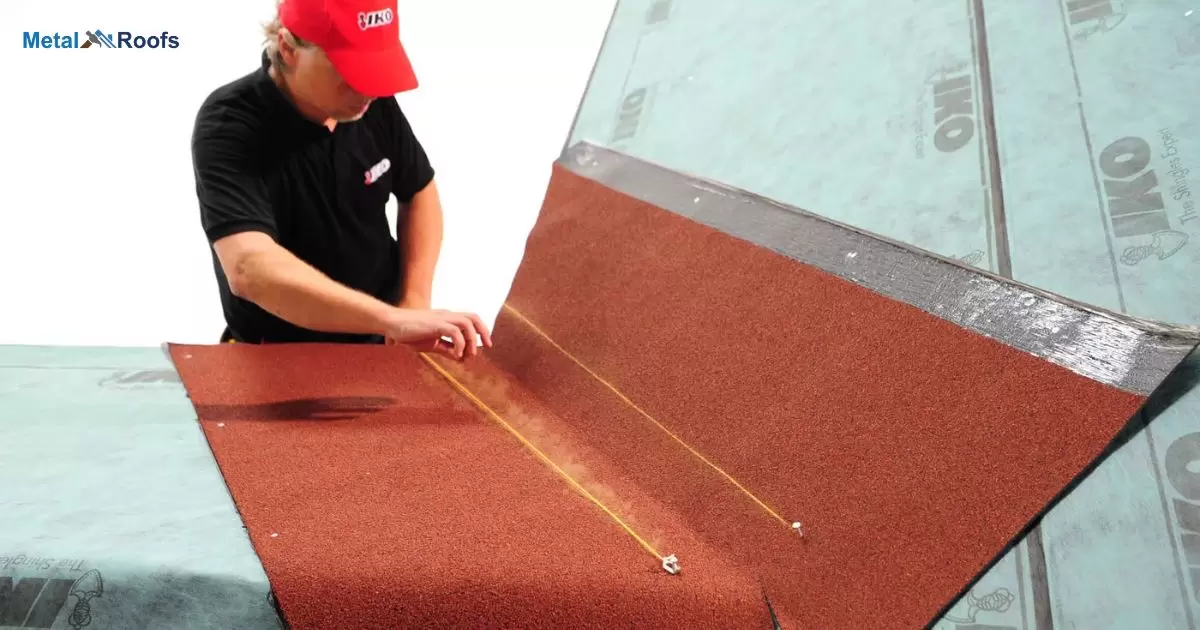
Valleys need precise metal cuts. Position roof panels over valley. Mark cut lines on metal panels. Use metal snips to cut valleys. Bend cut edges for secure fit. Install valley flashing under cuts. Ensure water flows down valleys. Proper cuts prevent roof leaks.
Metal roofs demand precision cuts. Valleys pose unique challenges. How to cut metal roofing to fit valleys? Careful marking guides the cuts. Proper bending ensures tight fit. Flashing prevents water infiltration. Valleys drain rainwater safely. Precise cuts equal leak-free roofs.
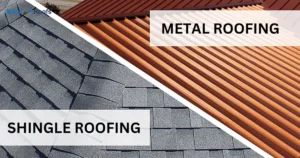
Valleys, crucial points in a roof’s design, require meticulous attention to prevent a potential leak in a metal roof. Precision cuts and careful installation of valley flashing are paramount. Ensuring a tight fit and proper water flow downward is essential for leak prevention.
Key Takeaways
- Measure valley dimensions precisely.
- Cut with metal snips or electric shears.
- Always use gloves and safety glasses.
- Stabilize the metal panel before cutting.
- Check the cut piece in the valley and adjust if necessary.
- Securely attach the fitted piece, ensuring no gaps.
Valley Roof
A valley roof has two slopes that meet to form a V shape. This area needs special attention. Measure the valley carefully. Mark the metal panels with clear lines. Use snips or shears to cut along the marks. Always wear gloves and safety glasses.
Test the fit of each piece in the valley. Adjust as needed to ensure a snug fit. Secure the metal pieces firmly. Double-check all measurements before cutting. Work carefully and safely on ladders. A precise fit ensures a weather-tight roof.
How To Install Valley Metal On A Shingle Roof?
| Steps | Description |
| 1. Prepare the Valley Area | Clear debris and ensure the valley area is clean and free from obstructions. |
| 2. Measure and Cut Valley Metal | Measure the length of the valley and cut the valley metal to fit using tin snips. |
| 3. Install Underlayment | Apply a layer of roofing underlayment along the valley area to provide additional waterproofing. |
| 4. Position Valley Metal | Place the valley metal along the valley line, ensuring it overlaps the underlayment. |
To install valley metal on a shingle roof, start by measuring the valley. Cut the metal to fit the measured length. Make sure it extends past the eaves. Place the metal in the valley and ensure it lies flat. Secure it with roofing nails along the edges. Overlap the metal if more than one piece is needed.
Next, install shingles over the valley metal. Start at the bottom and work your way up. Lay the shingles over the metal, ensuring they cover the edges. Cut the shingles to fit the valley angle. Nail them down securely. Check for gaps and adjust as needed. This will ensure a watertight seal.
Roof Valley Flashing

Roof valley flashing directs water away from the roof. It protects the valley where two roof slopes meet. Start by measuring the valley length. Cut the flashing to fit these measurements. Use tin snips or shears for cutting. Make sure the edges are smooth.
Install the flashing in the valley. Place it under the roofing material. Overlap each piece by a few inches. Secure it with roofing nails. Seal the edges with roofing cement. This prevents water from seeping in. Proper flashing ensures a leak-free roof.
Metal Roof Valley Flashing
Metal roof valley flashing directs water away from valleys. It prevents leaks and water damage. Measure the valley length accurately. Mark the metal panel for cutting. Use metal snips or shears. Cut along the marked lines.
Fit the flashing into the valley. Check for a snug fit. Make adjustments if needed. Secure the flashing in place. Ensure no gaps exist. Follow safety rules while working. Complete the valley with additional panels.
How To Measure A Metal Roof?
To measure a metal roof, start by measuring the length and width of each section. Use a measuring tape for accuracy. Write down each measurement. Measure from the eaves to the ridge for the length. Measure the width from one side to the other.
Add the measurements to find the total area. Include overhangs in your calculations. Double-check all measurements to avoid mistakes. If the roof has valleys or dormers, measure these areas separately. Combine all measurements for the final total. This will give you the exact roof size.
How To Cut Metal Roofing To Fit Valleys?
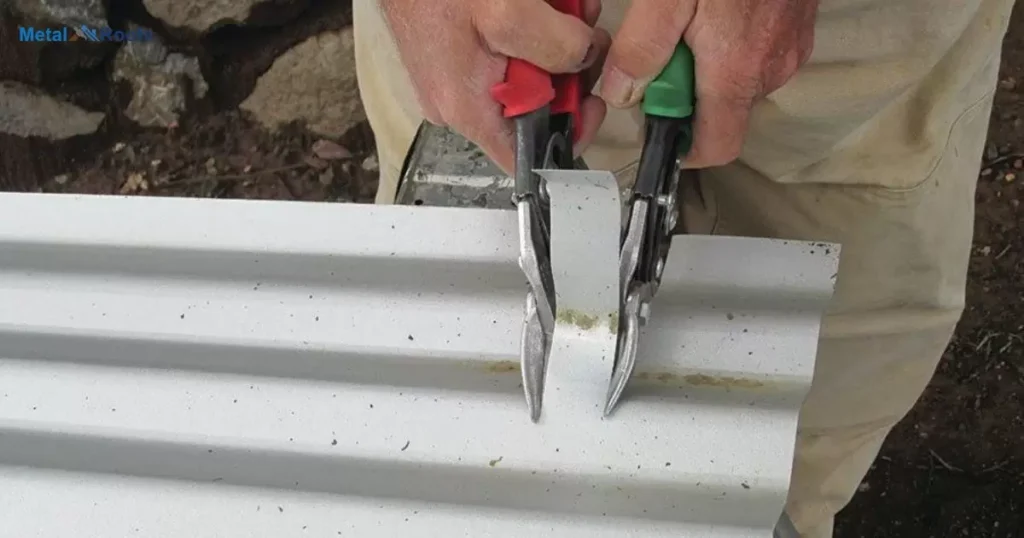
To cut metal roofing to fit valleys, first measure the valley. Use a marker to draw cut lines on the panel. Make sure the angles match the slope. Secure the metal sheet on a stable surface. Wear gloves and safety glasses for protection. Use metal snips or electric shears to cut along the lines.
Check the fit of the cut piece in the valley. Trim if needed for a snug fit. Secure the piece in place following roofing instructions. Repeat the process for other panels. Always double-check measurements and markings before cutting. Handle the metal with care and use ladders safely.
Valley Metal Roof Home Depot
At Home Depot, you can find a variety of metal roofing options suitable for valleys. They offer different types of metal panels, including aluminum and steel, designed to fit valleys of various sizes. You can choose from pre-cut panels or have them cut to your specific measurements in-store.
Metal roofing at Home Depot is durable and weather-resistant, providing long-lasting protection for your home. Installation is straightforward, and you can find all the necessary tools and accessories at Home Depot to complete the job efficiently. With their range of options and convenient availability, Home Depot is a reliable choice for valley metal roofing needs.
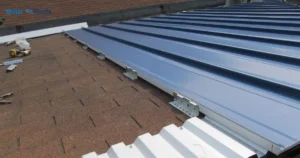
Metal Roof Valley Detail
When installing metal roofing in valleys, precise measurement is key. Start by measuring the valley from the ridge to the eaves. Mark the metal panels with a marker, ensuring angles match the valley slope. Use metal snips or electric shears for cutting. Always wear gloves and safety glasses for protection.
Secure the metal panel before cutting, then check the fit in the valley. Install the panels securely, ensuring no gaps. Repeat the process for additional panels if needed. Work carefully and safely, handling metal with caution and using ladders or scaffolding as necessary.
Cutting Metal Roofing Panels
Measure accurately from ridge to eaves. Mark cut lines with a marker and square. Cut with snips or electric shears, wearing gloves and glasses. Secure panels firmly before cutting. Test fit in the valley and adjust if needed. Attach securely to avoid gaps. Repeat for additional panels. Double-check measurements before cutting. Handle metal with care for safety.
Using The Proper Shear
Use the correct shear for cutting metal roofing panels. Wear safety gear and secure panels before cutting. Test the fit and attach securely. Repeat the process, checking measurements and handling with care.
Cutting Techniques For Different Materials
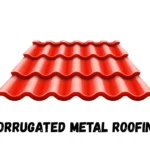
Consider the material when cutting metal roofing panels. Use snips or shears for corrugated metal and tin. For thicker metals like steel or aluminum, use power tools like circular saws with metal-cutting blades. Always prioritize safety and wear protective gear.
Avoiding Burrs And Sharp Edge
When cutting metal roofing panels, be mindful of burrs and sharp edges. Use quality snips or shears to minimize rough edges. Ensure gloves and safety glasses are worn for protection. Check cut edges for smoothness before installation. Proper tools and caution prevent injuries and ensure a clean finish.
Choosing The Right Tools
When choosing tools for cutting metal roofing for valleys, precision is key. Opt for metal snips or electric shears for accurate cuts. Ensure you have safety gear like gloves and glasses to protect yourself. Measure carefully and use a marker to mark the panels accurately. Always stabilize the metal panel before cutting to prevent movement.
Test the fit in the valley and adjust if needed before installation. Once cut, securely attach the fitted piece to avoid gaps in your roof. Repeat the process for additional panels as required. Remember to double-check measurements and work safely throughout the process.
Cutting Angles For Valleys
When cutting angles for valleys, start by measuring accurately. Use a marker to mark the metal panels with the correct angles. Ensure your cuts match the slope of the valley by using a carpenter’s square. Cut the metal with precision using snips or electric shears. Always wear gloves and safety glasses to protect yourself.
Test the fit of the cut pieces in the valley and make adjustments if needed. Finally, securely install the fitted pieces according to the roofing instructions. Repeat the process for additional panels as necessary to cover the entire valley. To work safely at all times, especially when handling sharp metal edges and using ladders or scaffolding.
Bending And Hooking Panels
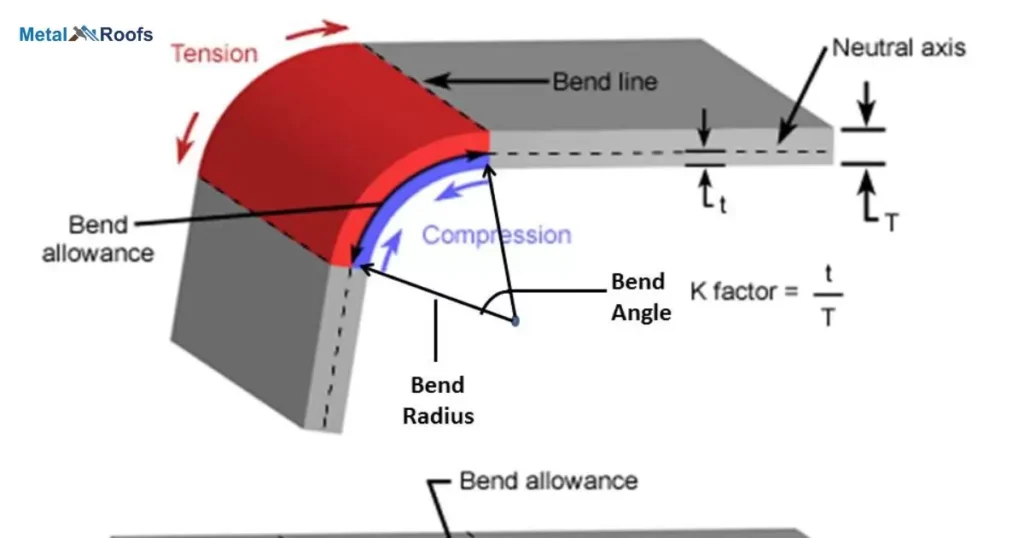
When bending and hooking panels, start by measuring the bend points accurately. Use a marker to mark where the bends will occur. Next, secure the panel in a bending brake, ensuring it’s firmly held in place. Gently bend the panel to the desired angle, using the brake as a guide.
Once bent, check the angle to ensure it matches your requirements. To hook panels together, align the hooks on one panel with the slots on another, sliding them together firmly. Repeat this process for all panels needing to be hooked together.
Frequently Asked Questions
How To Measure Valleys On A Roof?
Measure valleys on a roof by extending a measuring tape along the valley from the ridge to the eaves, marking the length and width accurately.
How To Put A Valley In A Roof?
To put a valley in a roof, measure accurately, cut panels along the centerline, overlap them correctly, secure with screws, and seal joints with roofing cement.
How Do They Cut Metal Roofing?
Measure, mark, cut with snips or shears, wear safety gear, secure metal, check fit, install securely, repeat as needed, double-check measurements, work safely.
Conclusion
In conclusion, cutting metal roofing for valleys requires precision and care. By measuring accurately, marking, and using the right tools, you ensure a proper fit. To wear safety gear and secure the metal before cutting to prevent accidents.
Checking the fit and installing securely are crucial steps to ensure a weather-tight roof. Repeat the process as necessary, always double-checking measurements to avoid mistakes. Lastly, prioritize safety throughout the process, especially when working at heights.