Fix gutter nails means securing loose nails that hold your gutters in place. You’ll need a hammer, nails, and possibly a ladder. Simply hammer the loose nails back into the fascia board to ensure your gutters stay firmly attached and prevent water damage to your home.
How to fix gutter nails? With just a hammer, nails, and a steady hand, you can secure those loose nails in no time. Don’t let loose gutters cause water damage to your home tackle the problem head-on with these easy steps.
Fixing gutter nails is crucial for maintaining the integrity of your home. Loose nails can lead to sagging or falling gutters, which can cause water damage to your roof and foundation. By promptly addressing this issue, you can prevent costly repairs down the line.
Key Takeaways
- Gather tools, hammer, nails, and ladder.
- Hammer loose nails back into the fascia board.
- Prevents gutter sagging, avoiding water damage.
- Saves money by addressing issues promptly.
Inspecting For Loose Gutter Spikes
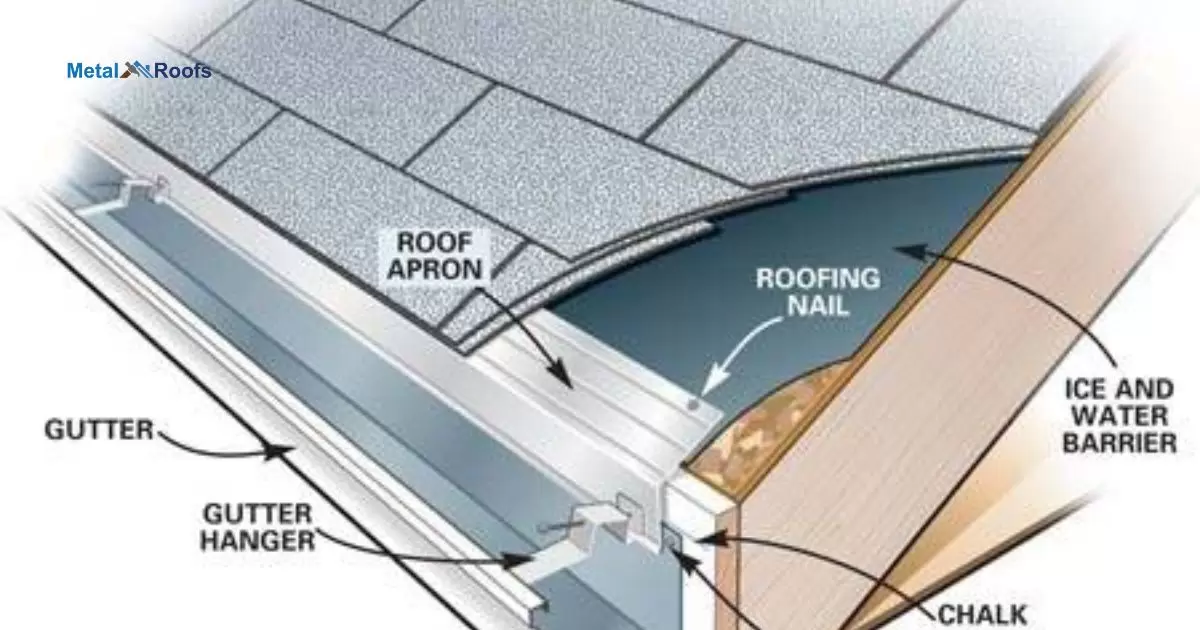
Inspecting for loose gutter spikes is crucial to maintaining your gutter system. Begin by visually inspecting the length of your gutter for any spikes that may appear loose or missing. Use a ladder to safely access the gutter and gently tap on each spike with a hammer to check its stability.
If there’s a gap between the drip edge and gutter, secure or replace loose spikes. Hammer loose spikes back in place and replace missing spikes to keep the gutter attached securely to the fascia board and prevent water damage.
Identifying Water Stains On Siding Or Brick
| Sign of Water Stains | Siding or Brick |
| Discoloration or Dark Spots | Siding |
| Efflorescence (white, chalky substance) | Brick |
To identify water stains on siding or brick, start by visually inspecting the exterior of your home. Look for areas where the color of the siding or brick appears darker than usual, indicating moisture absorption. Check for any visible mold or mildew growth, which thrives in damp environments.
Another way to identify water stains is to feel the surface of the siding or brick. If it feels damp or spongy to the touch, there may be water damage. Inspect the seams and joints of the siding or brick for signs of water penetration, such as peeling paint or mortar.
Tightening Loose Spikes
Tightening loose spikes in your gutter is a straightforward process. Start by identifying the loose spike and grab a ladder to access it. Next, use a hammer to gently tap the spike back into place, ensuring it’s firmly secured.
If the spike is still loose, you can use a drill to insert a gutter screw for a more secure hold. Make sure to check the alignment of the gutter after tightening the spike to ensure proper drainage. Regular maintenance can help prevent spikes from becoming loose in the future.
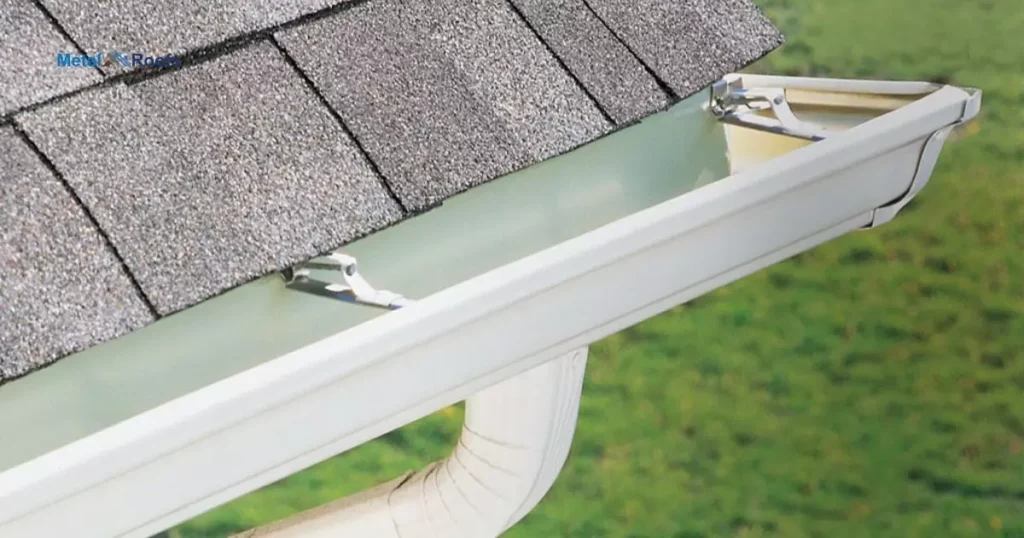
Replacing Gutter Spikes With Hidden Hangers
To replace gutter spikes with hidden hangers, start by removing the old spikes using a drill. Place the hidden hanger in the same spot and drive a screw through the hanger and into the fascia board. Repeat this process along the length of the gutter, spacing the hangers evenly.
Once all hangers are installed, snap the gutter into place on the hangers. Ensure the gutter is properly sloped towards the downspout for proper drainage. Inspect the gutter regularly and tighten any loose screws as needed to maintain its stability.
Choosing The Right Gutters For Your Home
When choosing gutters for your home, consider the material. Aluminum is lightweight and won’t rust. Vinyl is affordable but can crack in extreme cold. Steel is strong but prone to rust. Copper is durable and adds a stylish look, but it’s expensive.
Next, consider the style of the gutter. K-style gutters are popular and efficient at draining water. Half-round gutters have a more traditional look and are easier to clean. Finally, think about the size of the gutter. Larger gutters can handle more water but may be more expensive.
Ensuring Proper Installation Of Gutters
To ensure proper installation of gutters, start by measuring the length accurately. Use a chalk line to mark the slope towards the downspout every 10 feet. Install fascia brackets every 2 feet to support the gutter. Secure gutter sections with screws or nails, ensuring they slope correctly.
After installing the gutters, check for proper alignment and secure all connections. Test the system with water to ensure proper drainage. Regularly clean gutters to prevent clogging and damage.Inspect for loose hardware or damage and repair promptly to maintain proper function.
Tightening Gutter Spikes With A Screwdriver

To tighten gutter spikes with a screwdriver, start by checking for loose spikes along the gutter. Use a ladder to access the area safely. Once you locate a loose spike, place the screwdriver on the head of the spike. Turn the screwdriver clockwise to tighten the spike securely into place.
Repeat this process for any other loose spikes along the gutter. After tightening all the spikes, ensure the gutter is properly aligned for effective water flow towards the downspout. Regularly check and tighten gutter spikes to prevent future issues and maintain the gutter’s stability.
Replacing Gutter Screws Or Brackets
Replacing gutter screws or brackets is a simple task. First, remove the old screw or bracket using a screwdriver or drill. Then, place the new screw or bracket in the same spot and secure it tightly. Repeat this process for each damaged or missing screw or bracket along the gutter.
To check the alignment of the gutter after replacing the screws or brackets to ensure proper drainage. Regular maintenance can prevent future issues, so inspect your gutters regularly for loose or damaged hardware.
Repairing Gutter Holes With Plastic Roofing Cement
Repairing gutter holes with plastic roofing cement is a straightforward process. Start by cleaning the area around the hole with a wire brush to remove any debris or rust. Next, apply the plastic roofing cement generously over the hole, making sure to cover it completely.
Press the cement into the hole firmly to create a tight seal. Allow the cement to dry completely before testing the repair. Once dry, check the gutter for any remaining leaks. If necessary, apply a second coat of plastic roofing cement for added protection.
Improving Gutter Slope
To improve gutter slope, first, assess the current slope for proper water flow. Use a level to ensure the gutter has a slight downward angle towards the downspout. If needed, adjust the hangers to achieve the correct slope.
Check the alignment by pouring water into the gutter and observing the flow. adjustments as necessary to ensure water drains properly. Regularly maintain gutters by cleaning them out to prevent clogs and ensure water flows smoothly.
Inspect gutters for damage and repair any loose or missing components promptly. Consider installing gutter guards to prevent debris buildup and maintain proper slope over time.
Frequently Asked Questions
Can You Replace Gutter Nails With Screws?
Yes, you can replace gutter nails with screws. Simply remove old nails and replace them with screws using a screwdriver.
What Kind Of Nails Do You Use For Gutters?
Use galvanized steel or aluminum nails for gutters. Regular nails may rust and fail to hold securely.
Why Do Nails Come Out Of Gutters?
Nails come loose due to weather and wear, compromising gutter stability.
Conclusion
Fixing gutter nails is a simple yet essential task. Addressing loose nails promptly, you can prevent costly water damage. All it takes is a hammer, nails, and a little effort. Maintaining gutter stability safeguards your home from potential harm.
With regular checks and repairs, you can ensure your gutters remain secure and functional. Don’t overlook this task it could save you from major headaches later on.