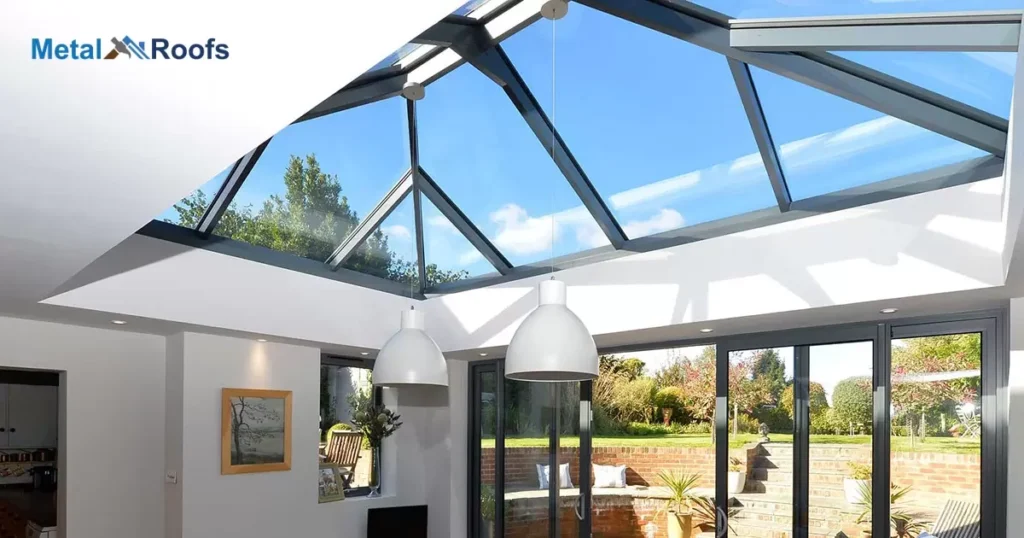
Skylight is a window installed on a roof to allow natural light into the building below. Skylights are often installed on shingle roofs, which use asphalt shingles as the roof covering. The skylight is mounted directly onto the roof decking and shingled around to blend with the existing roof.
How to install a skylight on a shingle roof? It takes planning, proper materials, roof access and good instructions. But skylights let bright natural light into inner rooms. Proper installation prevents leaks. We’ll walk through the key steps to safely add more light.
Installing a skylight on shingles involves precise steps like cutting, sealing, and blending with care, especially with overlap metal roofing lengthwise. The process ensures proper integration and prevents leaks when done accurately.
Key Takeaway
- Choose a sunny spot on the south-facing roof.
- Measure accurately and wear safety gear.
- Cut an opening for the skylight in the shingles.
- Weatherproof and seal the skylight securely.
- Insulate for energy efficiency.
- Maintain and inspect regularly.
Explanation of the benefits of skylights
Skylights bring natural light into your home, boosting mood and energy. Positioned on your shingle roof, they illuminate spaces, reducing the need for artificial lighting during the day. This not only saves on energy bills but also enhances the overall ambiance of your living areas.
The benefits extend beyond aesthetics skylights promote better ventilation, improving indoor air quality. Properly installed on your roof, they allow fresh air to circulate, creating a healthier and more comfortable living environment. In summary, skylights combine cost-effective lighting, improved ventilation, and a positive impact on well-being, making them a valuable addition to your home.
Overview of the installation process
| Step | Description |
|---|---|
| Download | Obtain the installation package from the official website or a trusted source. |
| Extract Files | If the package is compressed, extract its contents to a suitable location on your device. |
| Run Installer | Execute the installer application to initiate the installation process. |
| Configuration | Configure settings such as installation directory, language, and additional features. |
| License Agreement | Read and accept the software’s license agreement if prompted. |
| Installation | The installer will copy necessary files and install the software on your system. |
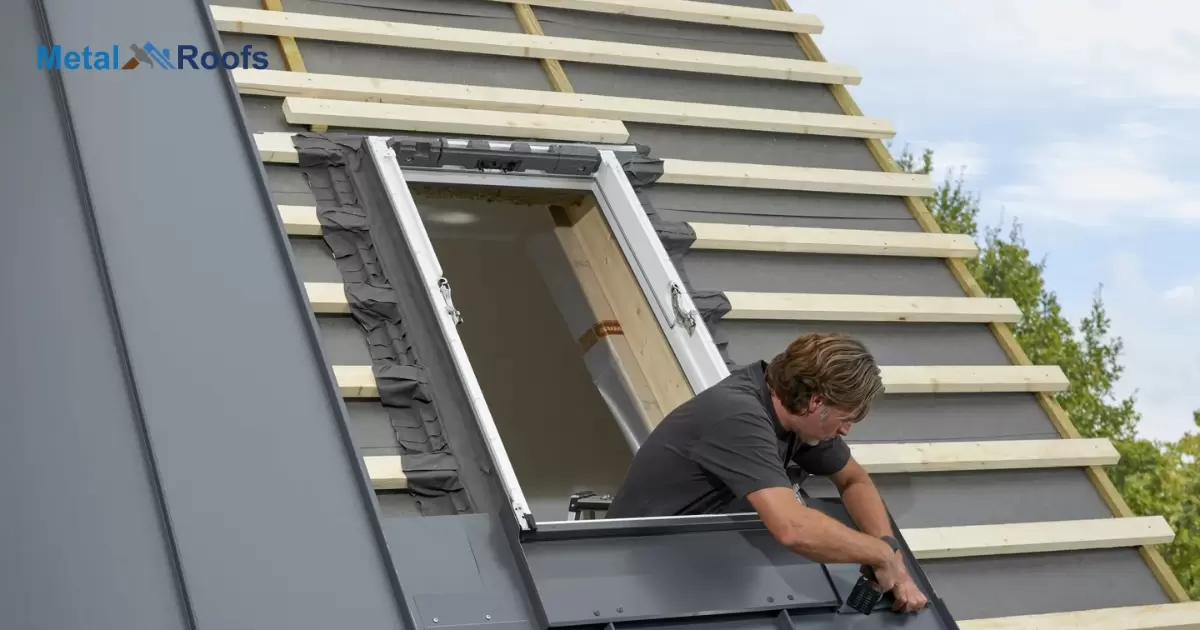
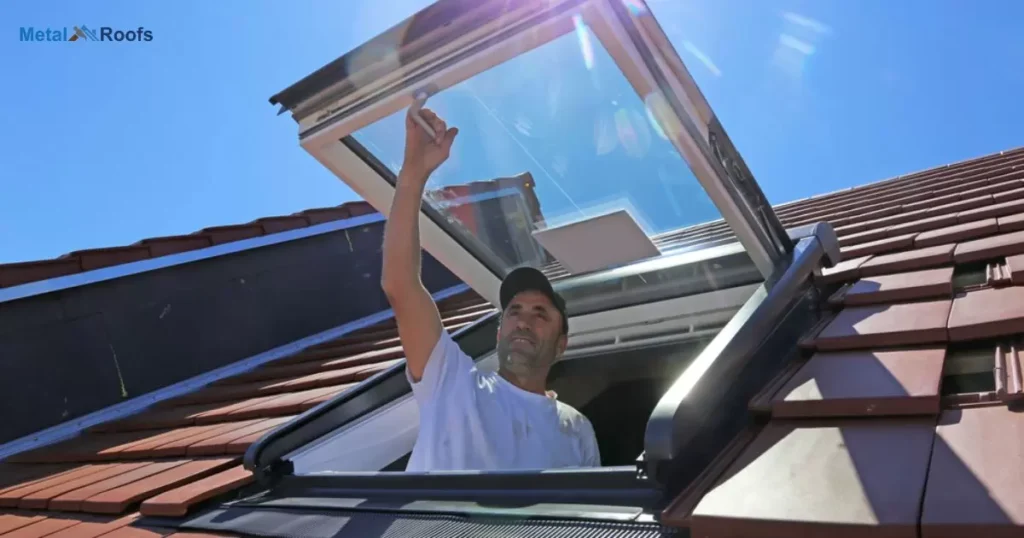
Installing a skylight on a shingle roof involves careful steps. First, pick the right spot by measuring and marking with a level. Prepare the roof by removing shingles and cutting the opening. Use the flashing kit to seal and secure the area around the skylight.
Mount the skylight frame securely and seal the edges with roofing cement. Then, install the shingles, making sure they overlap the flashing for a waterproof seal. Apply additional sealant for added protection. Check for leaks by spraying water and finish the interior according to the manufacturer’s instructions.
Checking the roof structure and condition
Firstly, examine your roof’s structure. Use a ladder and inspect for any sagging or uneven areas. Ensure the roof looks sturdy without visible signs of damage. If you notice any issues, consult a professional for advice.
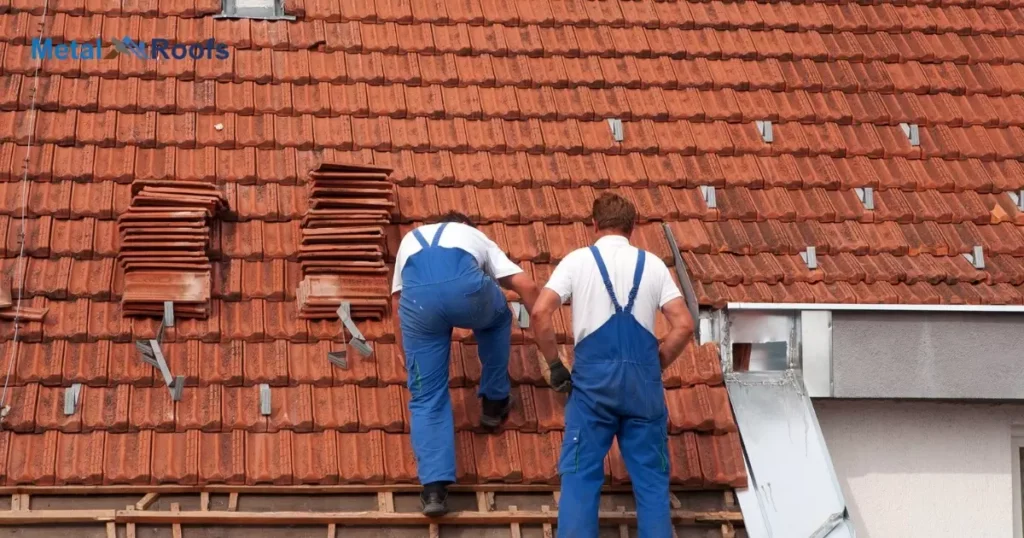
Secondly, check the roof’s condition. Look for missing or damaged shingles. Scan for cracks or holes. Replace any damaged shingles promptly. Regularly monitoring your roof’s structure and condition helps catch problems early, preventing costly repairs down the line.
Identifying the best location for the skylight
To pick the right spot for your skylight, think about the room and where sunlight matters most. Look at the roof layout and choose a spot that works. Measure and mark the skylight’s size accurately on the roof. Make sure the opening is square and in the right place.
Now, it’s time to cut and prepare the roof. Take off the shingles from the marked area. Use a saw to create the opening for the skylight. Get it ready for the skylight frame. Follow these steps, and you’re on the way to a sunny addition to your home.
List of tools and materials required for the installation
To kick things off, gather essential materials for a seamless skylight installation. You’ll need a skylight kit, roofing nails, and roofing cement to get started. Equip yourself with roofing felt and a flashing kit for effective water resistance. A pry bar and a reliable tape measure come in handy for precise roof preparation.
Once you’ve cleared the roof space, secure your skylight using a drill or screwdriver. To seal the deal, have roofing tar or sealant at the ready for waterproofing. Lastly, ensure safety with gloves and protective eyewear, making the installation a breeze.
Tips on selecting the right products for shingle roof installation
Selecting the right products for shingle roof installation is crucial for ensuring durability, performance, and longevity. Here are some tips to help you make informed decisions.
Choose High-Quality Shingles: Opt for shingles from reputable manufacturers with a proven track record. Look for brands that are known for their quality and durability.
Consider the type of shingle material, such as asphalt, wood, metal, or composite. Each material has its own advantages and considerations.
Consider Climate and Weather Conditions: Take into account the climate and weather conditions of your location. Different regions may require different types of shingles to withstand extreme temperatures, high winds, or heavy precipitation.
Underlayment: Invest in a high-quality underlayment to serve as an additional barrier against water infiltration. Popular options include synthetic underlayment or traditional felt paper.
Ventilation Products: Adequate ventilation is crucial for the longevity of your roof. Ensure proper ventilation by installing ridge vents, soffit vents, or other ventilation products as recommended by building codes and roofing experts.
Flashing and Sealants: Pay attention to the quality of flashing materials. Proper flashing around chimneys, vents, and other penetrations is essential for preventing water leaks.
Use high-quality sealants to ensure that gaps, seams, and joints are properly sealed, providing an extra layer of protection against water infiltration.
Cutting through the shingles and roof deck safely
To cut through the shingles and roof deck safely, first, mark the skylight dimensions on the roof. Use a pry bar to remove the shingles, exposing the roof deck. Employ a circular saw or reciprocating saw to carefully cut through the roof sheathing, creating the opening for the skylight.
Ensure the cut is precise and aligns with the marked dimensions. After cutting the opening, apply roofing felt around it and install the flashing kit provided. This ensures proper waterproofing and sealing. The skylight frame can then be securely placed into the opening, following the manufacturer’s guidelines.
Securing the skylight to the roof structure
When you’re securing the skylight, first, make sure the opening is the right size. Remove the shingles with a pry bar, and use a saw to cut through the roof. Install the flashing kit next, as per the skylight instructions. Put the skylight frame in the opening and follow the guide to secure it well.
Seal the edges with roofing cement for a tight fit. Then, nail the shingles back around the skylight, ensuring they overlap the flashing. Check for leaks by spraying water, and if all’s good, finish up the interior details as advised by the skylight maker.
Steps for flashing and sealing around the skylight
When you’re flashing and sealing around a skylight, follow these simple steps. First, mark the skylight’s spot on the roof and cut an opening, making sure it’s square and snug. Apply roofing felt and install the flashing kit per the skylight instructions for a tight seal.
Next, set the skylight frame in the opening and secure it well. Seal the edges with roofing cement or sealant, preventing leaks. Now, put back the shingles, cutting and nailing them around the skylight. Finish up by applying roofing tar or extra sealant for added waterproofing.
Insulating and finishing the interior of the skylight
First, insulate the skylight frame using fiberglass or foam board. Cut the material to fit snugly and secure it in place with adhesive. This keeps your space cozy by preventing heat loss or gain through the skylight. Finish the interior by adding drywall or paneling.
Measure and cut the pieces to match the skylight opening, ensuring a seamless fit. Attach the material using screws or nails. Finish with a coat of paint to match your room’s aesthetic. This simple process enhances insulation and gives your skylight a polished, integrated look.
Skylight Installation
Installing a skylight on a shingle roof involves several steps. First, choose the right skylight for your roof and space. Gather tools like safety gear, a ladder, measuring tape, chalk line, saws, pry bar, nails, cement, and flashing kit. Plan where to place the skylight and measure the area carefully.
Next, cut out the opening in the roof using a circular saw. Remove shingles and roofing materials neatly. Install the skylight flashing kit around the opening to prevent leaks. Place the skylight frame into the opening and secure it with roofing nails. Apply roofing cement around the edges for a waterproof seal.
Fitting A Skylight
Start by choosing the right skylight for your roof. Measure the spot where you want to place it. Cut out the section of shingles where you will fit the skylight. Make sure you follow the manufacturer’s guide for the exact size.
Next, install the flashing around the skylight to prevent leaks. Place the skylight into the opening and secure it with nails. Seal the edges with roofing cement for extra protection. Replace and secure the shingles around the new skylight.
Building A Skylight
Building a skylight starts with choosing the right one for your roof. Measure the area where you want to place it. Cut a hole in the roof and install the flashing to prevent leaks. Put the skylight into the hole and secure it.
Next, finish the installation by adding shingles around the skylight. Seal any gaps with roofing cement or sealant. Check for leaks after a rain. A well-installed skylight can bring in natural light and brighten your space.
Frequently Asked Questions
How do you install a skylight on an existing roof?
Find a spot on the roof, cut an opening, fit the skylight, and seal it tight with flashing and roofing cement to keep it leak-free.
What is the easiest skylight to install?
The easiest skylight to install is a tubular skylight. It’s a small, reflective tube that brings sunlight into your home. Install it in a day by cutting a hole and connecting the tubes for instant natural light.
Where should a skylight be placed on a roof?
Place the skylight on the south-facing slope. This maximizes sunlight throughout the day. Avoid the north side, as it receives less direct sunlight.
Conclusion
Planning ahead for the skylight location is important for best lighting. Ensuring you have the proper flashing, seals and shingles will prevent issues. Carefully following the step-by-step installation guide is vital to do it properly. Working in good weather and safe roof access contributes to a smooth process.
Carefully measuring and cutting the roof opening for the skylight takes time and precision. Properly flashing around the opening and making a water-tight seal is crucial for preventing leaks. Integrating the skylight frame with surrounding shingles results in a nice finished look.