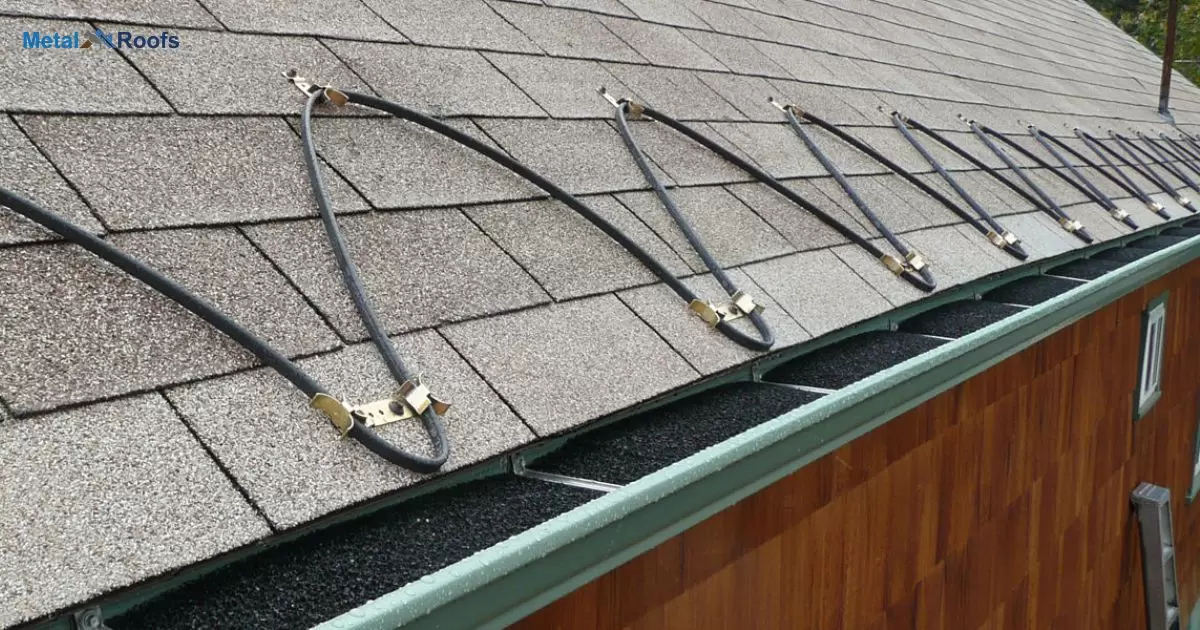
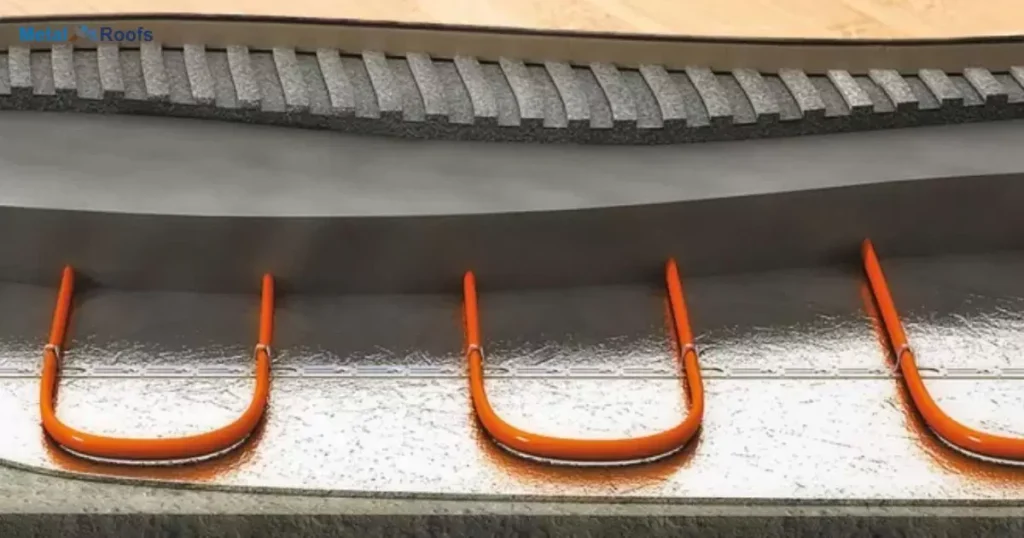
Install heat cables prevent ice buildup. They warm roofs from underneath. Installed on metal roofs. Powered by electricity. Keep melting snow and ice. Stop dangerous icicle formation. Protect roofs and gutters. Require proper installation. Need careful cable layout. Ensure even heat distribution.
Winter’s icy grip threatens roofs. Icicles pose grave danger. Heat cables offer solution. how to install heat cable on metal roof? Proper layout crucial. Even heat distribution key. Prevent ice dams forming. Safeguard roofs and gutters. Follow installation guide carefully.
Ice buildup poses yearly risks, with gutters coming loose from house being common. Metal roofs aren’t immune. Heat cables defend. Proper install prevents disasters. Measure roof, calculate cable length, ensure coverage. Layout design crucial. Evenly spaced cables important.
Key Takeaways
- Assess roof for ice dam prone areas.
- Choose appropriate heat cable for outdoor use.
- Plan cable layout along eaves and valleys.
- Clean roof surface thoroughly.
- Secure cable with mounting clips or straps.
- Install cable with proper spacing and connections.
Heat Cables For Gutters
Heat cables for gutters are essential for preventing ice dams in cold climates. They help to melt snow and ice that can accumulate in gutters and downspouts, preventing water damage to roofs and interiors. Installing these cables involves planning the layout along the gutter system and securing them with clips or straps.
Once installed, the cables should be connected to a power source and tested for proper functionality. Regular maintenance is important to ensure the cables continue to work effectively, and monitoring energy usage can help manage costs. By following these steps, homeowners can protect their gutters from winter weather-related damage and maintain the integrity of their roofs.
Heat Tape For Metal Roof
| Benefits | Installation Tips |
| Prevents ice dams | Assess roof for prone areas |
| Protects against damage | Choose suitable outdoor heat tape |
| Easy to install | Plan layout along eaves and valleys |
| Increases roof lifespan | Clean roof surface thoroughly |
Installing roof heat tape on a metal roof is essential for preventing ice dams. Assess your roof for areas prone to ice buildup. Choose roof heat tape suitable for outdoor use. Plan its layout along the roof’s eaves and valleys. Clean the roof thoroughly before installation.
Secure the tape with mounting clips or straps. Install it with proper spacing and connections. Test the system before finishing the job. Regular maintenance and monitoring are crucial. Consider energy usage and safety precautions throughout the process.
Are Roof Heat Cables Dangerous?
Roof heat cables can be safe if installed and maintained properly. Assess your roof for areas prone to ice dams, like eaves and valleys. Choose cables designed for outdoor use and compatible with your roof’s voltage. Plan their layout carefully and secure them with appropriate clips or straps.
Ensure the cables are installed with proper spacing and connections. Test the system before leaving to confirm it functions correctly. Regular maintenance and monitoring are essential to keep the system safe and effective. Be mindful of energy usage and follow safety precautions to prevent accidents.
Metal Roof Heat Cable Clips
When installing heat cable on a metal roof, using the right clips is crucial. Metal roof heat cable clips ensure secure attachment without damaging the roof’s surface. These clips are designed to withstand outdoor conditions and provide a stable anchor for the cable.
Properly installed heat cable clips help maintain the correct spacing between loops, ensuring even heating and preventing potential damage. Before installation, clean the roof surface thoroughly and position the clips along the eaves and valleys. Then, secure the heat cable in place using the clips, following the manufacturer’s instructions carefully.
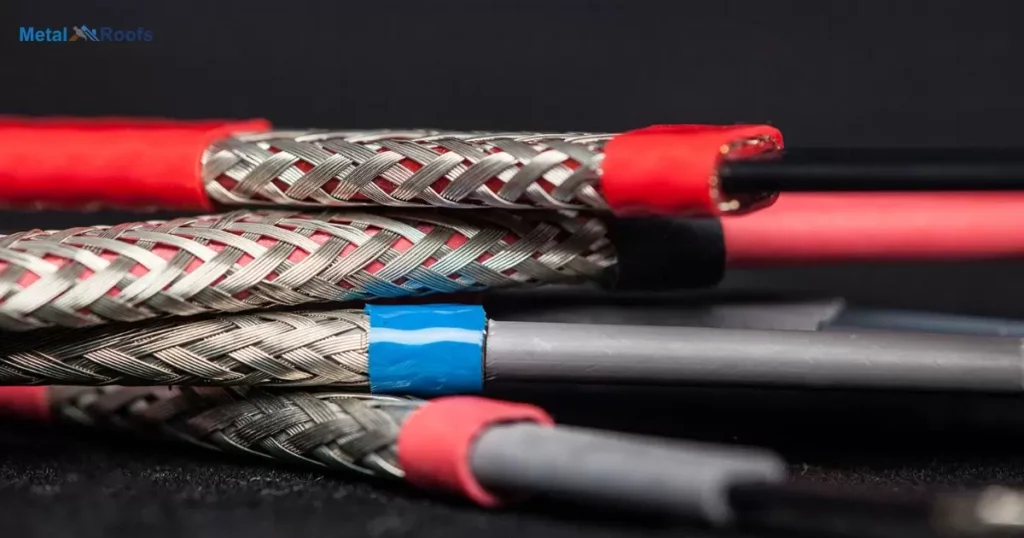
Choosing The Right Heat Cable
When choosing the right heat cable, start by assessing your roof for ice-prone spots. Select a cable suitable for outdoor use and compatible with your roof’s voltage. Plan where to place the cable along the eaves and valleys. Ensure the roof surface is clean before installing to guarantee proper adhesion.
Next, secure the cable with mounting clips or straps designed for metal roofs. Install the cable following the manufacturer’s instructions, keeping proper spacing between loops. Test the system before completing the installation to ensure everything works as expected.
Installing The Heat Cable
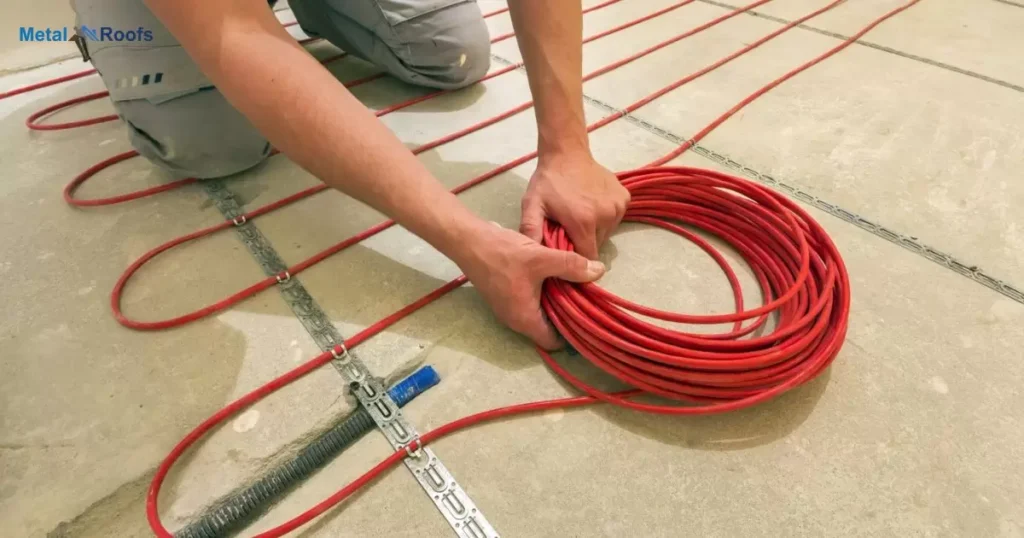
To install the heat cable, first, evaluate the roof for spots prone to ice dams. Choose a suitable cable rated for outdoor use. Plan where to place the cable along the eaves and valleys. Clean the roof surface thoroughly before starting.
Next, use mounting clips or straps to secure the cable in place. Install the cable according to the manufacturer’s instructions. Test the system before finishing up. To maintain and monitor the system regularly.
Best Practices And Tip
When installing heat cable on a metal roof, start by assessing areas prone to ice dams. Choose a suitable heat cable and plan its layout along the eaves and valleys. Clean the roof thoroughly before securing the cable with mounting clips or straps. Install the cable with proper spacing and connections, testing the system before completion.
Cable Handling
When installing the heat cable, handle it with care. Avoid bending or kinking the cable during installation. Ensure proper positioning along the roof’s eaves and valleys.
Cable Storage
When installing the heat cable, proper cable storage is crucial. Store cable neatly to prevent tangling. Avoid kinks or bends to maintain cable integrity. Efficient storage ensures smooth installation process.
System Upgrades
When installing the heat cable, consider system upgrades. Ensure compatibility with modern features. Upgrade as necessary for optimal performance.
Preventing Damage From Snow And Ice
To prevent damage from snow and ice, start by checking your roof for areas prone to ice dams. Choose a suitable heat cable and plan its layout along the eaves and valleys. Clean the roof surface well before securing the cable with clips or straps. Install the cable carefully, ensuring proper spacing and connections.
Once installed, test the system to ensure it works before finishing up. Regular maintenance and monitoring are essential to keep the system functioning effectively. Be mindful of energy usage and safety precautions throughout the process. With these steps, you can safeguard your home from the potential damage caused by snow and ice.
Additional Resources
For further assistance, refer to manufacturer’s guidelines. Online tutorials offer visual guidance. Seek professional help for complex installations. Join forums for DIY tips and troubleshooting. Community workshops may offer hands-on training. Check local hardware stores for helpful guides.
Manufacturer Instructions
Under the heading additional resources, you can find manufacturer instructions. These provide crucial guidance for proper installation and maintenance. Follow them carefully to ensure effectiveness and safety.
Industry Standards
Under additional resources, understanding industry standards is crucial. Industry standards ensure quality and safety across operations. Stay updated to maintain compliance and improve practices.
Professional Assistance
Under the heading additional resources, consider seeking professional assistance. Professionals can offer expert advice and ensure proper installation. Their expertise can enhance the effectiveness and longevity of your heat tape system.
Frequently Asked Questions
Can You Put A Heat Trace On A Metal Roof?
Yes, you can put a heat trace on a metal roof by selecting the right cable, cleaning the surface, securing it properly, and testing the system for effectiveness.
How To Install A Heat Line On A Roof?
Assess the roof, choose suitable heat cable, plan layout, clean surface, secure with mounting clips, install with care, test system, maintain regularly, monitor energy use, prioritize safety.
How Do You Use A Roof Heat Cable?
Identify ice-prone areas, choose suitable cable, plan layout, clean roof, secure cable, install with proper spacing, test system, maintain regularly, consider energy usage and safety.
Conclusion
Installing heat cable on a metal roof is a straightforward process. By carefully assessing the roof’s needs and following the proper installation steps, you can effectively prevent ice dams and protect your home from winter weather-related damage. To regularly maintain and monitor the system for optimal performance and safety.
Prioritize safety by following manufacturer instructions and considering energy efficiency. With proper planning and attention to detail, you can ensure that your roof heat cable system operates effectively, providing peace of mind during cold weather seasons.