Skylights are windows installed on flat roofs to let in natural light. They are typically glass or plastic domes that sit raised above the roof to allow light through while preventing leaks. Skylights brighten rooms below without the need for artificial lights during daytime.
Installing a skylight on a flat roof let’s natural light into rooms below. But how to install a skylight on a flat roof correctly? Proper placement and sealing are key. Leaks can damage a roof. Following key steps carefully makes installation safe and effective.
Proper skylight placement maximizes light and minimizes leaks. North facing skylights get the most natural light during the day. Locate between rafters to simplify framing and improve support. Allow at least 18 inches around all sides for safe access and sealing. Positioning matters for best skylight performance.
Key Takeaways
- Choose a suitable skylight meeting local codes.
- Clear debris for a safe, clean installation environment.
- Gather essentials like a skylight kit, roofing membrane, and necessary tools.
- Carefully measure and cut the roof opening using appropriate tools.
- Follow Velux guidelines for installation, using provided adhesive and flashing kit.
- Optimal pitch is 2% for drainage, though some flat skylights can be installed completely level.
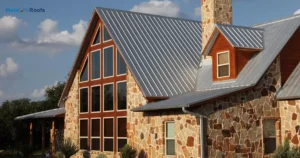
Factors To Consider When Choosing A Skylight For A Flat Metal Roof
When selecting a skylight for a flat metal roof, consider its size and placement. A well-placed skylight maximizes natural light without compromising the roof’s integrity.
Ensure the skylight is compatible with the Insurance Companies Cover Metal Roofs roof material and that the installation maintains the roof’s watertight seal. Prioritize energy-efficient options to minimize heat transfer and enhance insulation.
Types Of Skylights Suitable For Flat Metal Roofs

Choosing the right type of skylight for a flat metal roof involves considering factors like durability, insulation, and aesthetic appeal. Here are a few types suitable for such roofs:
Fixed Skylights: These skylights don’t open and are sealed shut, making them ideal for flat roofs where ventilation isn’t a priority. They are low-maintenance and provide a sleek, modern look.
Curb-Mounted Skylights: Designed to be mounted on a raised curb above the roof surface, these skylights work well with flat metal roofs. The raised curb helps in preventing water pooling and ensures proper drainage.
Comparison Of Different Skylight Materials
When comparing different skylight materials, glass is a popular choice for its clarity and aesthetics. It allows abundant natural light and offers a sleek appearance, enhancing the overall ambiance of the space. Glass skylights may be heavier and more expensive than alternatives.
On the other hand, acrylic skylights provide a lightweight and cost-effective option. While not as clear as glass, they still allow ample sunlight and are durable. The choice between glass and acrylic depends on factors such as budget, desired aesthetics, and structural considerations for the flat roof installation.
Preparing For Installation
Select a suitable skylight meeting local codes. Identify the optimal roof location, considering sunlight and interior layout. Clear debris for a clean, safe installation.
Tools And Materials Needed For Installation
For skylight installation, gather essential tools and materials. You’ll need a skylight kit, roofing membrane, adhesive, flashing kit, roofing screws, and a drill. Other tools include a screwdriver, measuring tape, level, utility knife, roofing nails, and roofing felt.
Measuring And Marking The Skylight Location
Start by measuring and marking the chosen skylight location on the flat roof. Use a measuring tape to ensure precision, and mark the corners accurately. Double-check measurements and use a level to guarantee proper alignment before proceeding to the next steps in the installation process.
Cutting The Opening In The Metal Roof
To install a skylight on a metal roof, begin by measuring and marking the desired opening. Use a drill to create pilot holes at the corners of the marked area. Use a reciprocating saw or nibbler to carefully cut along the marked lines, creating the opening for the skylight.
Installing The Skylight On A Flat Metal Roof

| Step | Description |
| 1 | Position and secure the skylight over the cut opening using roofing screws. |
| 2 | Apply roofing adhesive for waterproofing and check alignment with a level. |
| 3 | Install the flashing kit, securing it with screws for a tight seal. |
| 4 | Place the skylight frame, fasten with roofing screws, and check for a proper fit. |
| 5 | Apply adhesive along the frame edges and install the flashing kit for waterproofing. |
| 6 | Check for gaps, apply additional sealant if needed for a weather-resistant installation. |
Position the skylight over the cut opening in the metal roof, ensuring a precise fit. Secure the skylight in place using roofing screws and follow the manufacturer’s instructions for sealing and flashing.
Apply roofing adhesive or sealant around the edges for waterproofing, and check the skylight for proper alignment using a level.
After securing the skylight, install the flashing kit provided by the manufacturer. Use roofing screws to attach the flashing to the metal roof, ensuring a tight seal. Inspect the entire installation for any gaps or leaks and make necessary adjustments to guarantee a watertight and secure skylight on your flat metal roof.
Installing The Skylight Frame
Place the skylight frame over the cut opening, ensuring it fits securely. Use roofing screws to fasten the frame to the metal roof, maintaining a tight seal. Once attached, check for levelness and make adjustments as needed for a secure and proper fit.
Apply roofing adhesive or sealant along the edges of the frame to enhance waterproofing. Install the flashing kit provided with the skylight to create a watertight barrier between the frame and the roof. Secure the flashing in place with additional roofing screws, ensuring a snug and weather-resistant installation.
Flashing The Skylight To Prevent Leaks
With the skylight in place, the next crucial step is flashing to prevent leaks. Apply roofing adhesive around the opening and install the flashing kit according to the manufacturer’s instructions. Ensure a watertight seal by securely attaching the flashing components to the roof and the skylight frame.
Proper flashing is essential for preventing water infiltration, especially on a flat roof. The flashing should cover the sides and top of the skylight, creating a barrier against rain and snow.
Check for any gaps or loose areas, and apply additional sealant if necessary to guarantee a robust and weather-resistant installation.
Sealing The Skylight To Ensure Proper Insulation

Apply roofing adhesive or sealant around the edges of the skylight opening to ensure a watertight seal.
Use a flashing kit designed for flat roofs to cover the sides and top of the skylight, providing additional waterproofing. Press the flashing firmly into place, securing it with roofing screws to prevent leaks and ensure proper insulation.
Inspect the entire installation for any gaps or areas that may compromise the seal. Apply additional sealant as needed to address any potential points of water infiltration. Proper sealing is crucial to maintaining the skylight’s insulation properties and preventing leaks in the long term.
Finishing Touches
Apply roofing adhesive around the cut opening for a watertight seal. Install the skylight using roofing screws and follow the manufacturer’s instructions. Ensure proper waterproofing with a flashing kit and inspect for any gaps.
Check the skylight’s functionality and adjust interior finishes if needed. Seal gaps with roofing adhesive, and ensure the surrounding roofing material is secure. Regular maintenance will help sustain the skylight’s effectiveness.
Installing Blinds Or Shades For Light Control
After successfully installing the skylight, consider enhancing light control and privacy with blinds or shades.
Measure the skylight dimensions accurately to ensure a proper fit for the chosen window treatment. Install the blinds or shades according to the manufacturer’s instructions, allowing you to regulate sunlight and create a comfortable indoor environment.
Cleaning And Maintaining The Skylight
After successfully installing the skylight, it’s crucial to clean any construction debris or adhesive residue from the skylight and surrounding area. Use a mild detergent and water solution along with a soft cloth to avoid scratching the skylight surface.
Regular maintenance involves inspecting the skylight for any signs of leaks, checking seals, and ensuring proper insulation. Keep the skylight clean to maximize natural light, and promptly address any issues to maintain its functionality and longevity.
Troubleshooting Common Skylight Problems
Skylight problems such as leaks, condensation, and drafts are common. To troubleshoot leaks, inspect and replace damaged flashing or sealant.
For condensation, adjust humidity or consider a ventilated skylight, and address drafts by ensuring proper insulation and sealing gaps around the frame.
Velux Flat Roof Skylight Installation Instructions

Preparation: To install a Velux flat roof skylight, start by preparing the roof surface. Ensure the area is clear of debris and measure the desired location for the skylight. Follow Velux’s specific guidelines for selecting the appropriate skylight size and style.
Installation Process: Apply the provided roofing adhesive around the skylight’s perimeter, then secure it in place with Velux-approved screws. Use the included flashing kit to ensure proper waterproofing. Follow Velux’s detailed installation instructions carefully, and consult a professional if needed for a seamless installation of your flat roof skylight.
Roofing Skylights
Roofing skylights brighten up your space. They bring natural light into your home. They also save energy by reducing the need for artificial light. Installing a skylight can be a DIY project. Choose the right spot on your roof. Measure and mark the area carefully.
Cut the opening with care. Frame the edges to support the skylight. Place the skylight in the opening and secure it. Add flashing to seal out water. Apply roofing sealant to prevent leaks. Replace any roofing material removed. Inspect your work for gaps or loose parts. Enjoy the new light in your home.
Skylight Window
A skylight window brightens a room with natural light. It brings a fresh and airy feel to any space. Installing one on a flat roof needs careful planning. Choose the right spot to avoid obstructions. Measure and cut the opening with care.
Fit the skylight snugly into the frame. Secure it well to prevent leaks. Add flashing around the edges for extra protection. Seal all joints to keep water out. Finish by replacing any roofing material removed. Enjoy the added light and warmth.
Frequently Asked Questions
Can you put skylights on a flat roof?
Yes, skylights can be installed on a flat roof, but it requires careful planning to ensure proper waterproofing and structural support. Consult with a professional to determine the best approach for your specific flat roof construction.
Can you have skylights with a flat ceiling?
Yes, skylights can be installed in a flat ceiling, providing natural light and an open feel to the space. Proper installation ensures they integrate seamlessly with the ceiling surface.
What pitch should a skylight be on a flat roof?
Skylights on a flat roof should ideally have a minimal pitch of 2% to allow proper drainage of water. Some flat roof skylights are designed for a completely level installation.
Conclusion
Skylights let natural light into dark rooms. But improper installation causes leaks or even roof failure. Follow skylight instructions precisely. Waterproof all seals and attachments. Test for leaks before finishing the ceiling. Correct any gaps or cracks immediately.
Well-placed skylights brighten rooms for less cost than new windows. Getting the placement right from the start saves time and money. Preparing the roof properly makes sealing effective. Taking care at each step leads to years of sunlight with no drips inside. The effort opens a new space full of natural glow.